Especially sharper digital images.
By its nature, digital images from every digital cameras are slightly blurry. This is because virtually all digital camera have an anti aliasing filter in front of the sensor, such a filter involves a trade-off among sharpness. Why do we need this filter? Read about it here.
The anti aliasing filter is also known as an optical low-pass filter.
 Some cameras like certain Canon models used TWO low-pass filters!
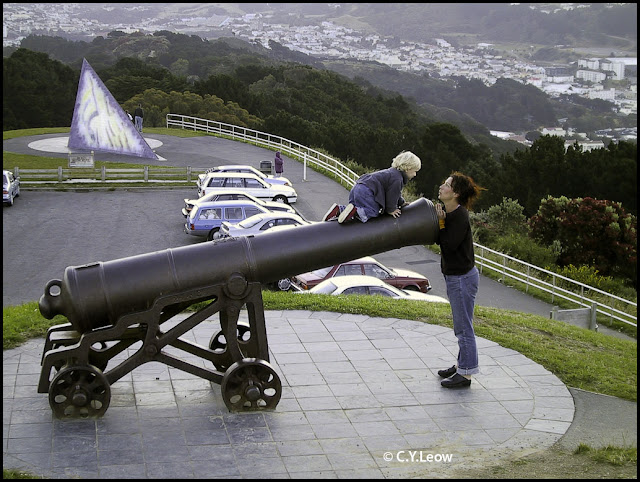 The picture above was taken by me with a digital point & shoot, it might look sharp to you; but when we enlarge it to 100% we notice it is very slightly blur... the sharpness should be better.
 Can we make the picture sharper? Of course we can, by using a sharpening filter! There is a really good article here!
So which sharpening filter I use and which one I like best? Keep reading ;)
The Unsharp Mask filter (USM)
If you do not know what USM is, please read about it here.
You can now find this useful sharpening tool in most graphics and image editing software. I use the one in Photoshop.
But how do I know how many percent I need to sharpen my pictures? Here is a quick trick... but first look at the video.
You notice I placed my cursor at the percentage box and that allow me to use the scroll wheel for increasing the amount of sharpening.
I like to keep my radius at "1" and the threshold at "5" to minimise the formation of "halo".
I turned my mouse scroll wheel while watching my preview (100%) carefully, when the image reach the sharpness I want; I stop. Sometime when I need a little "more power", I push the radius to 1.5 or 2.
Of course I am over simplifying what USM can do, I suggest you Google "unsharp mask tutorial" to read and learn what this marvelous filter can do for your digital image!
A word of advice, ALWAYS apply sharpening to a COPY of your image because once you apply USM and save your image, the effect is SET IN STONE and the effect cannot be undone!
Topaz Detail 2
When I need more option in my sharpening, Detail 2 is another sharpener I like to use.
Take a look at the option you can use in your sharpening work flow!
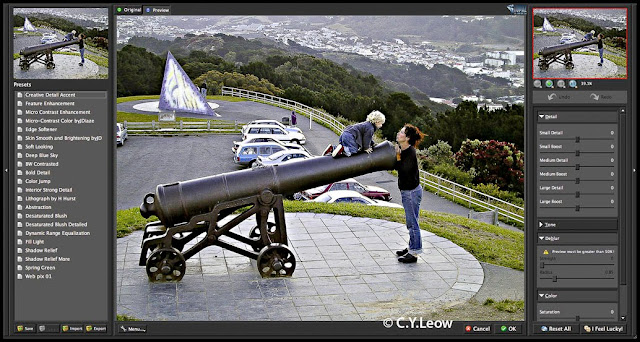 Not for the faint of heart though ;)
Not bad for a US$39.99 sharpener! Why don't you download the fully operational (but time limiting) trail and play with it? You might like it.
Now, the Mother of All Sharpener and my favorite!
Pixel Genius - PhotoKit Sharpener
Pixel Genius claim that:
"Other products may provide useful sharpening tools, but only PhotoKit Sharpener provides a complete image "Sharpening Workflow". From capture to output, PhotoKit Sharpener intelligently produces the optimum sharpness on any image, from any source, reproduced on any output device. But PhotoKit Sharpener also provides the creative controls to address the requirements of individual images and the individual tastes of users."
And you know what? It is true!
This is my sharpener of choice! For US$99.95, see what you are getting!
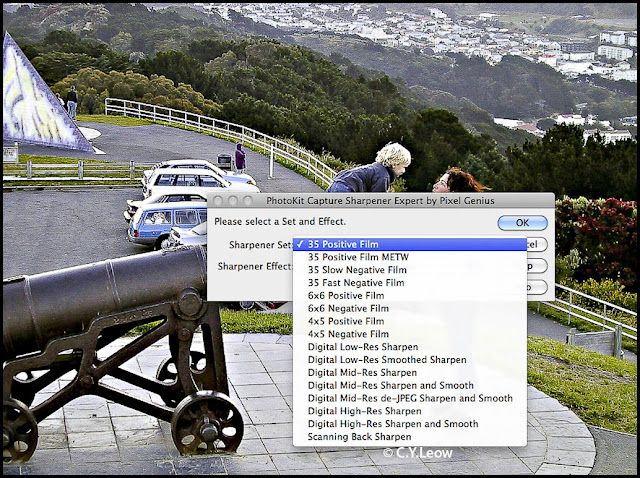 You are able to dial in the OPTIMUM sharpening for different film format to digital. Yes, each media need different sharpening setting!
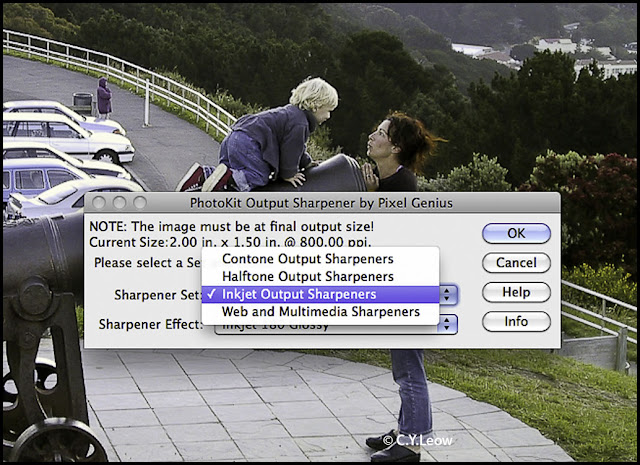 It even have separate sharpeners for contone, halftone and INKJET! May be now you realise why your inkjet print look a bit blur? The web and multimedia sharpeners option is great for publishing on the web!
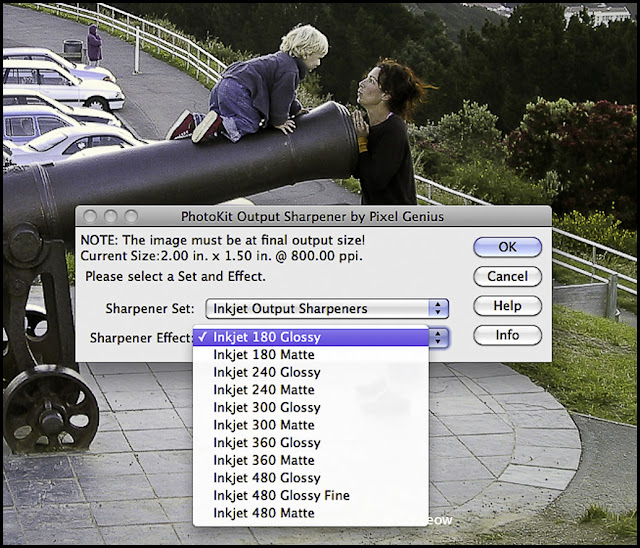 You can even give optimum sharpening to different grade of paper!
By the way, I DO NOT work for Pixel Genius ;)
There you are... go sharpen your pictures to make them look better!
Famous Last Words:
Here is a little secret, do you know that USM can also be use as a very effective "digital haze filter"? Look at the two photos below and notice the haze over the background in the top photo. Now compare that to the second photo where a USM of 50/25/0 is applied, notice the improvement?
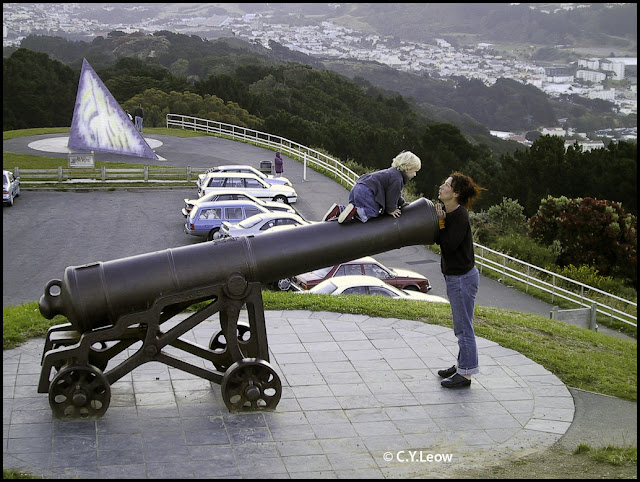
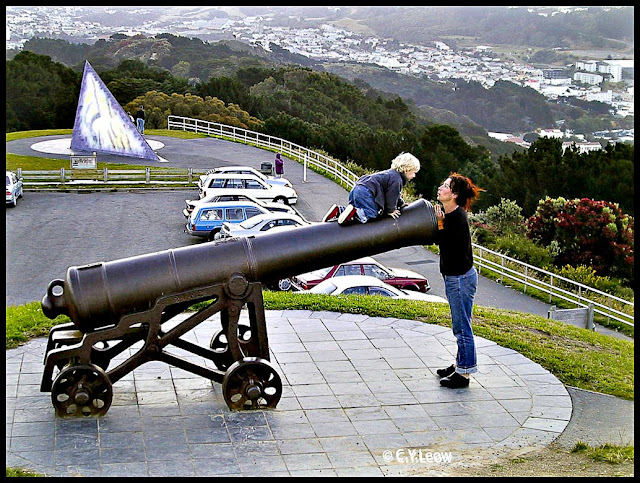 You can use my "scroll wheel" method while watching how much haze is disappearing and stop scroll wheeling when you notice halo setting in :)
That's that for this week... happy sharpening!

No comments:
Post a Comment